Oil Painting Subject Difficulty Estimator
Choose Your Subject
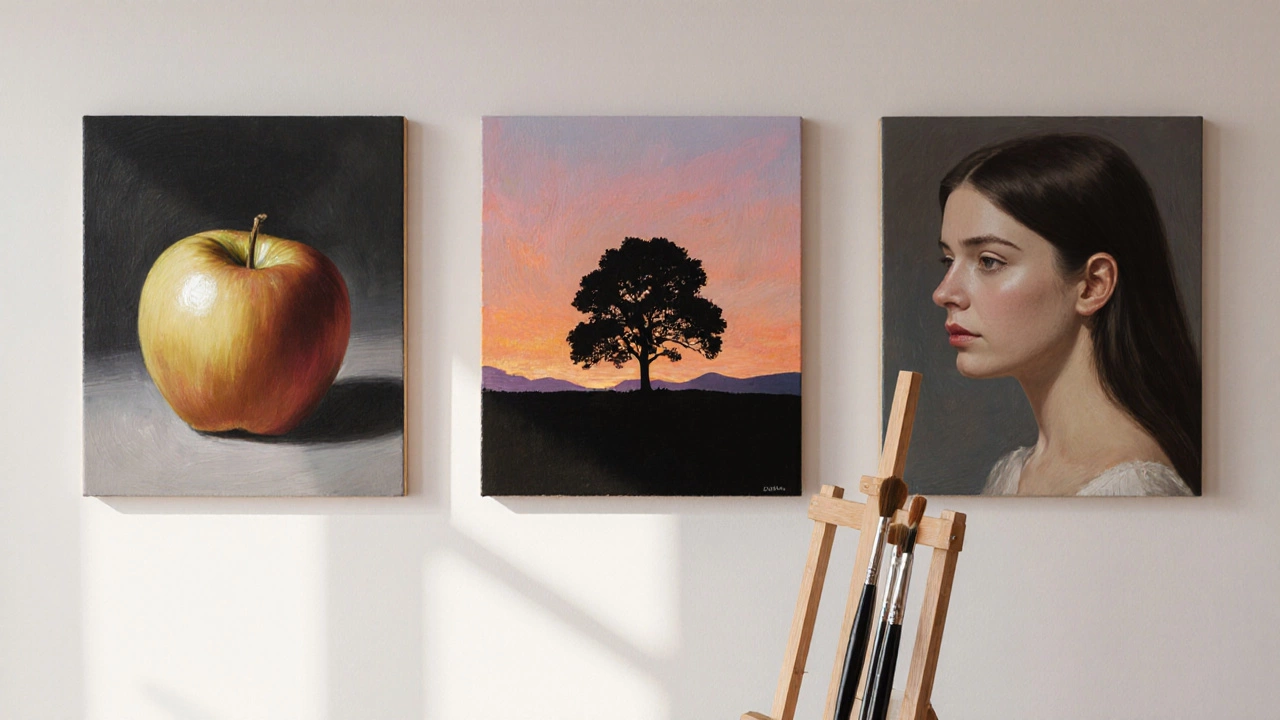
Select a beginner-friendly oil painting subject to see its difficulty level and recommended techniques.
When you pick up oil painting a medium that uses pigment mixed with drying oil, you’re opening a world of color and texture, the first project can set the tone for your whole journey. The right idea should be fun, doable in a weekend, and teach a handful of core techniques you’ll reuse forever. Below you’ll find a step‑by‑step guide to easy subjects, the essential materials, and the three beginner‑friendly techniques that turn a shaky start into a confident finish.
Why a Simple First Project Matters
A beginner who jumps straight into a complex composition often ends up frustrated. The canvas becomes a mess of muddy colors, the brush strokes feel uncontrolled, and the motivation fades. Starting with a modest idea keeps the learning curve gentle, gives you quick wins, and lets you focus on mastering the basics-color mixing, brush control, and layering. Those early successes become the foundation for more ambitious works later on.
Choose the Right Subject: Beginner‑Friendly Ideas
Some subjects naturally lend themselves to simple shapes, limited colors, and clear lighting. Here are three classic go‑to ideas that have helped countless newcomers finish their first painting without a single panic attack:
- Single fruit or vegetable (an apple, a lemon, a potato). The form is easy to block in, and the color palette stays tight.
- Simple landscape silhouette (a hills‑and‑sky scene or a lone tree against a sunset). Large shapes let you practice underpainting and glazing.
- Basic portrait study (a side profile or a face in soft light). You can focus on skin tones and subtle value shifts.
Pick the one that excites you most; the enthusiasm will push you through the inevitable drying time.
Set Up Your Workspace: Materials & Basics
A solid setup removes a lot of guesswork. Below is a quick rundown of the gear you’ll need, each introduced with a short definition so you know why it matters.
A good canvas stretched fabric that serves as the painting surface provides a reliable base for beginners. Choose a medium‑size pre‑primed canvas-around 16×20 inches works well for most simple subjects.
Your brush a tool with bristles used to apply paint collection can stay minimal: a flat ½‑inch brush for large areas, a round ¼‑inch for details, and a filbert for soft edges.
A palette the flat surface where you mix colors-even a cheap wooden board-will let you experiment with limited palettes without spilling paint everywhere.
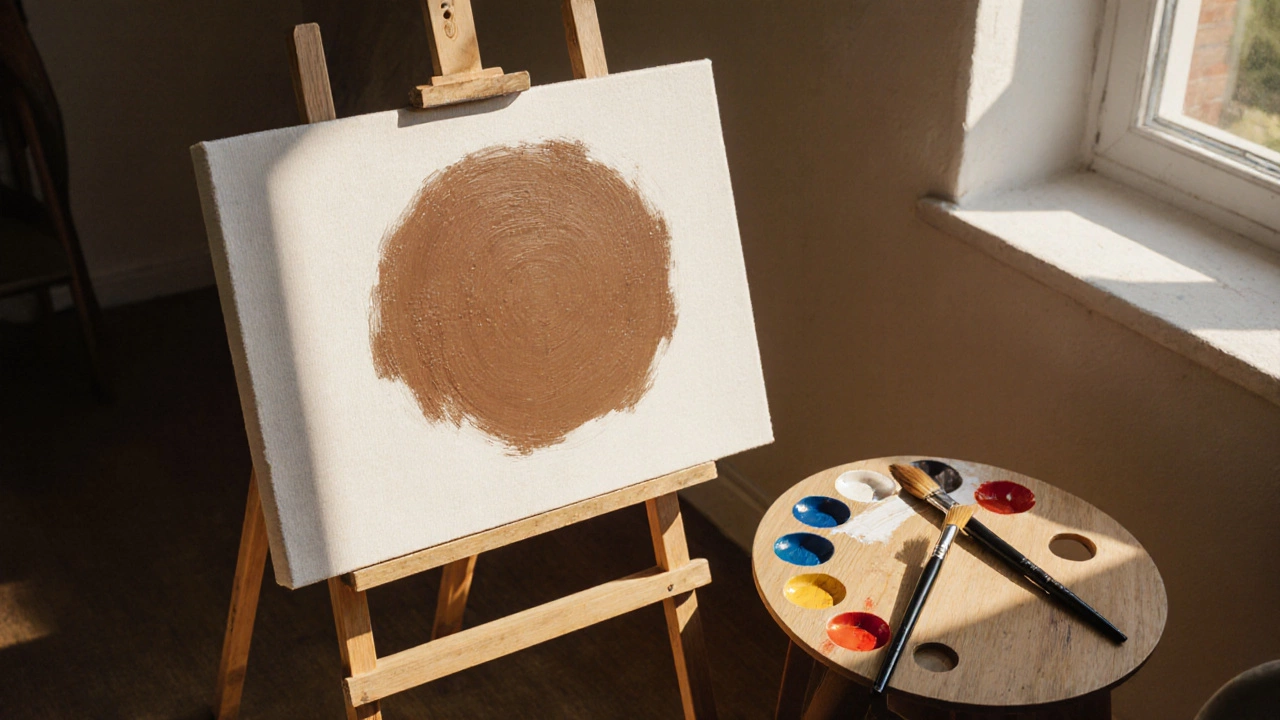
Don’t forget underpainting a monochrome layer that establishes values before color is added. A thin, fast‑drying layer of burnt umber or raw sienna helps you see where lights and darks belong.
Finally, work with a limited palette a small set of colors mixed to create a broad range of tones. Restrict yourself to three or four colors (e.g., cadmium red, ultramarine blue, cadmium yellow, plus white). This forces you to learn color mixing and prevents a chaotic mess of pigments.
Technique #1: Underpainting for Value Control
Start every piece with a thin wash of a single hue diluted with mineral spirits. Use a flat brush to block in the darkest shadows in a deep brown, the mid‑tones in a lighter brown, and the highlights left white. Let this layer dry (or at least become tacky) before you apply color. The underpainting acts like a sketch in paint-your later colors will sit on top, preserving the value structure you’ve already mapped.
Technique #2: Limited Palette Mastery
Mixing from a narrow selection teaches you to read temperature and saturation. For a fruit still life, combine cadmium red with cadmium yellow to get a vibrant orange, then tone it down with a touch of ultramarine for shadow. Add a dash of white to lift the mix for the lit side of the fruit. Because you’re using the same base colors everywhere, the painting will have a harmonious look.
Technique #3: Glazing for Depth
Once the first color layers are dry (oil paint can take 24‑48 hours for a thin layer), apply a translucent glaze of a complementary hue. A thin glaze of raw umber over the shadow side of a landscape adds richness without re‑blocking the forms. Use a soft, clean filbert brush, dip it in a mixture of paint and linseed oil, and spread the glaze in thin, even strokes. The glaze alters the underlying tone, creating a sense of depth that flat color alone can’t achieve.
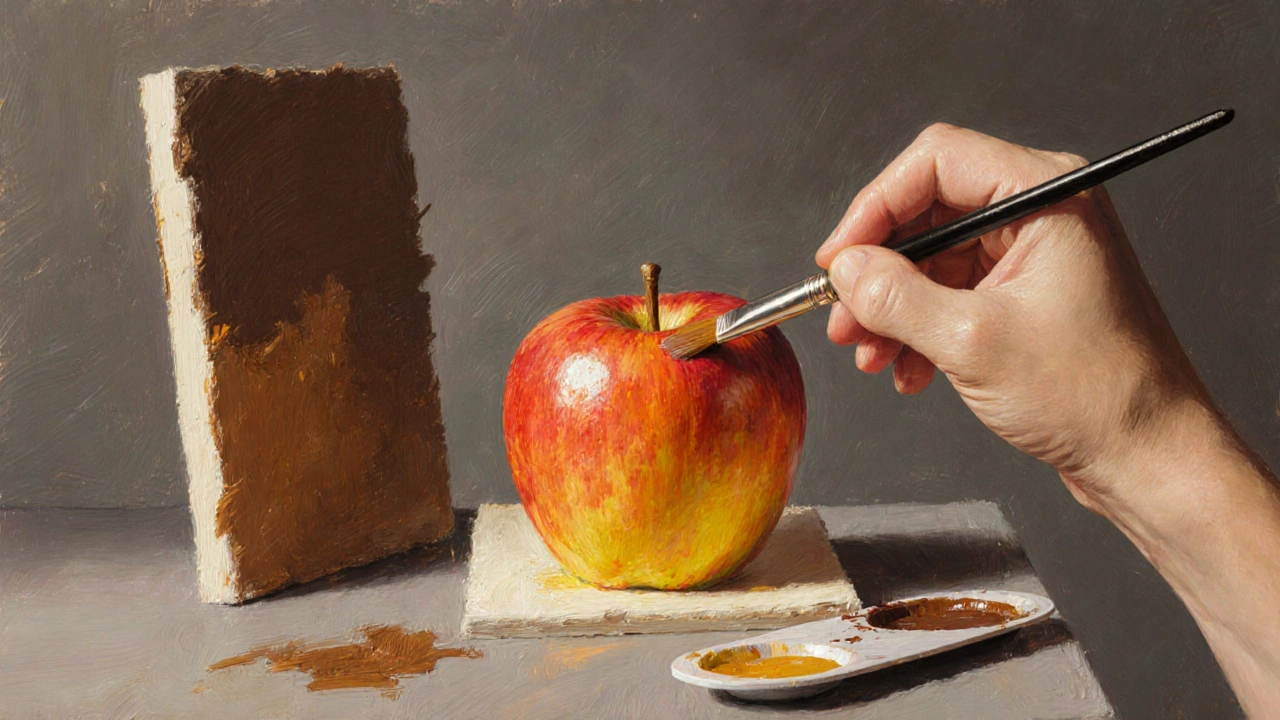
Step‑by‑Step Example: Painting a Simple Apple
- Sketch the shape: Lightly draw an oval on the canvas with a charcoal stick or thinned burnt umber.
- Underpaint: Fill in shadows with a diluted burnt umber, leave the highlights blank.
- Lay down the base color: Mix cadmium red + cadmium yellow for a bright orange. Apply with a flat brush, staying within the sketch lines.
- Develop form: Darken the core shadow by adding a touch of ultramarine to the orange mix. Lighten the highlight with a tiny amount of white.
- Refine edges: Use the filbert brush to soften the transition between light and dark, creating a rounded, three‑dimensional feel.
- Glaze for richness: After the base dries, glaze a thin layer of raw umber over the shadowed side. This deepens the color without muddying the entire apple.
- Add a background: Block in a simple dark-gray or muted green behind the apple using the limited palette. This makes the fruit pop.
- Final touches: Spot‑check for any hard edges, soften with a dry brush if needed, and sign your work in the corner.
The entire process can be completed in a weekend, and you’ll have practiced underpainting, limited palette mixing, and glazing-all essential tools for any oil painter.
Common Pitfalls and How to Avoid Them
- Too many colors: Stick to a limited palette. Adding extra pigments often leads to muddy mixes.
- Skipping the underpainting: Without a value map, colors can look flat. The underpainting is your value roadmap.
- Overworking wet paint: Oil stays wet for a while, but constantly dragging the brush can blur edges and create a greasy surface. Let each layer dry before adding details.
- Poor ventilation: Use mineral spirits and linseed oil in a well‑ventilated area to avoid fumes.
- Neglecting cleanup: Clean brushes with soap and mineral spirits immediately; otherwise, dried paint will ruin them.
Quick Checklist for Your First Oil Painting
- Choose a simple subject (apple, single tree, or silhouette).
- Gather a pre‑primed canvas (16×20 in).
- Prepare a flat brush, round brush, and filbert.
- Set up a wooden palette with cadmium red, ultramarine blue, cadmium yellow, and white.
- Apply a thin underpainting in burnt umber.
- Mix colors within the limited palette.
- Layer colors, let each dry, then glaze for depth.
- Step back, assess, and make final adjustments.
Comparison of Beginner‑Friendly Subjects
| Subject | Difficulty (1‑5) | Best Technique to Practice |
|---|---|---|
| Single fruit (apple, lemon) | 2 | Limited palette & color mixing |
| Simple landscape silhouette | 3 | Underpainting & glazing |
| Basic portrait side profile | 4 | Value control & subtle glazing |
Frequently Asked Questions
How long does a beginner oil painting take to dry?
Thin layers typically dry to the touch in 24‑48 hours. Thicker areas or heavy impasto can take several days. Always wait until the previous layer is dry before adding glazing.
Do I really need an expensive canvas for my first painting?
No. A medium‑size pre‑primed canvas from an art store works fine. Save money for good brushes and quality oil paints, which affect the outcome more.
Can I use acrylic brushes with oil paint?
It’s not recommended. Acrylic brushes can become stiff when saturated with oil paint, ruining the bristles. Stick to hog or synthetic brushes designed for oil mediums.
What’s the best way to clean brushes after painting?
Rinse first with mineral spirits to remove most paint, then wash with warm soapy water. Finish with a gentle brush conditioner to keep bristles soft.
Is a glaze the same as a wash?
Not exactly. A glaze is a thin, transparent layer applied over dry paint to shift color or add depth. A wash is usually an initial, diluted layer used for underpainting or background.