Watercolor Subject Selector
Find Your Perfect Watercolor Subject
Select your skill level and interests to get personalized subject recommendations for easy watercolor painting.
Watercolor painting is a fluid, transparent medium that lets artists blend colors directly on the paper. For newcomers, the biggest hurdle isn’t the brushes or pigments - it’s figuring out what to paint first. Picking a subject that works with watercolor’s natural flow can turn a frustrating mess into a rewarding splash of color. Below are the most beginner‑friendly subjects, the techniques that make them click, and a quick checklist of supplies you’ll need.
Quick Takeaways
- Start with big, open shapes like skies, simple leaves, or round fruit.
- Use the wet‑on‑wet technique for soft gradients and the dry brush technique for crisp edges.
- Cold‑pressed paper (140lb/300gsm) balances absorbency and texture.
- A round brush (size6‑8) is your all‑purpose tool; a flat brush helps with washes.
- Practice a light‑to‑dark color progression using a simple color wheel.
Why Easy Subjects Matter
When you’re learning watercolor, easy watercolor subjects give you room to experiment without getting tangled in detail. The medium’s transparency means mistakes show up quickly, but easy subjects let you recover with a new wash or a lift. Think of it like learning to drive on a quiet street before hitting the highway - you focus on steering, throttle, and brake before navigating traffic.
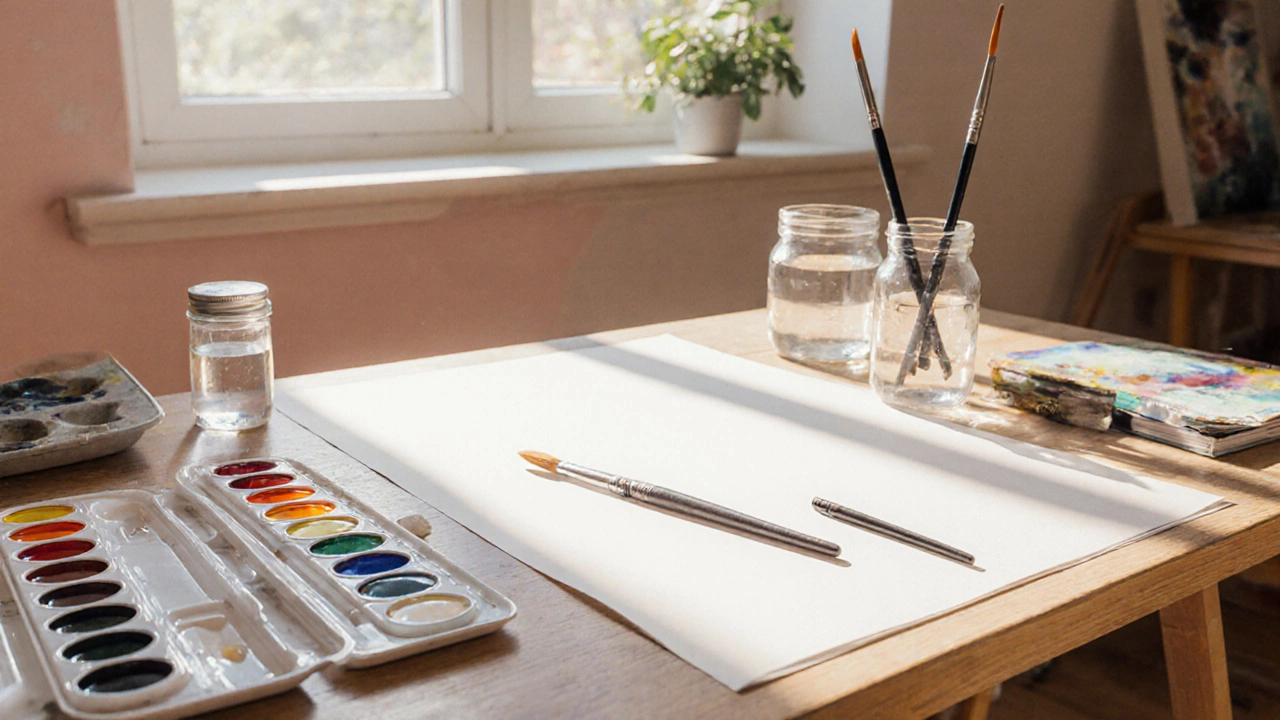
Essential Supplies for a Smooth Start
Before you pick a subject, make sure your toolkit matches the tasks you’ll tackle. Here’s a concise checklist:
- Paper: Cold‑pressed (140lb/300gsm) watercolor paper - absorbs water evenly and holds color without warping.
- Brushes: One medium round brush (size6‑8) and one flat brush (size1‑2). Synthetic fibers work fine for beginners.
- Paints: A set of 12 Pan colors (including a warm red, cadmium yellow, ultramarine blue, and a few earthy tones).
- Palette: A plastic mixing palette with wells; optional: a white ceramic plate for lifting colors.
- Water containers: Two jars - one for clean water, one for rinsing.
- Masking fluid: Helpful for preserving whites on a sky or a fruit highlight.

Top 5 Easiest Subjects to Paint
Each subject below pairs a simple shape with a technique that highlights watercolor’s strengths.
1. Open Sky with Gradient Wash
The sky is the ultimate beginner’s canvas. It’s just a large rectangle, but you can practice smooth gradients, color mixing, and the wet‑on‑wet technique. Here’s a quick workflow:
- Wet the entire sky area with clean water using a large flat brush.
- Drop in a few strokes of ultramarine blue and a touch of cadmium yellow on the top edge.
- Let the colors diffuse naturally, tilting the paper if needed to guide the flow.
- As the wash dries, add a thin layer of lighter blue near the horizon for depth.
- Finish with a crisp horizon line using a dry brush and a dark charcoal pencil (optional).
This exercise teaches you how pigments spread, how to control drying time, and how to create atmospheric perspective without drawing tiny details.
2. Simple Leaf Study
Leaves have a recognizable shape but don’t demand intricate anatomy. Use them to master the dry brush technique for veins and the wet‑on‑dry method for subtle shading.
- Sketch a basic oval leaf lightly with a pencil.
- Apply a light wash of sap green across the surface while the paper is still dry.
- While the first wash is still damp, introduce a darker green in the vein area using a round brush and a wet‑on‑wet approach.
- Once dry, drag a dry brush loaded with a darker shade along the main vein for texture.
- Add a tiny highlight of masking fluid on the tip before the first wash, then lift it later for a glossy look.
The leaf exercise reinforces control over line weight, layer transparency, and the way water affects pigment intensity.
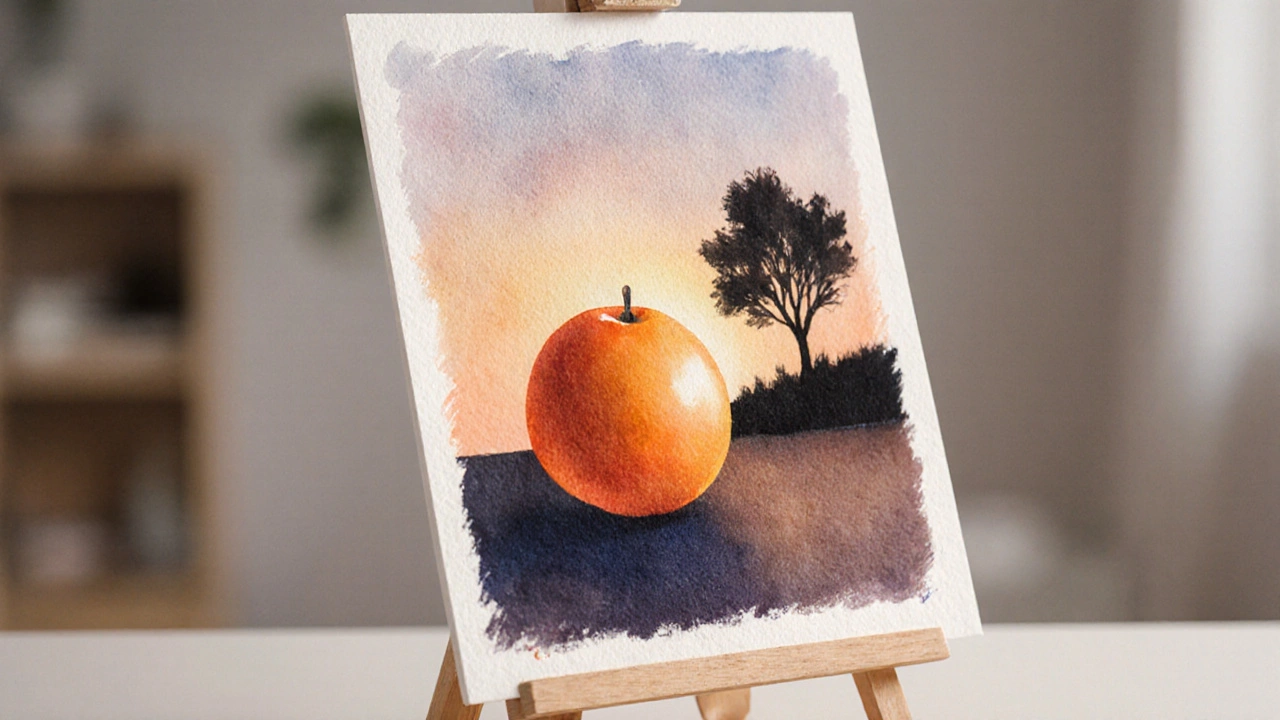
3. Round Fruit - Like an Orange or Lemon
Fruit offers a single, rounded form that’s perfect for practicing color mixing and creating a sense of volume with just a few strokes.
- Draw a light circle for the fruit’s outline.
- Wet the interior with a clean round brush - keep the edge dry to preserve the outline.
- Drop in a warm orange (or lemon yellow) near the top left, allowing it to flow outward.
- While the wash is still wet, add a cooler orange or a hint of blue on the opposite side to suggest shadow.
- After drying, lift a small bright spot with a damp paper towel to mimic a glossy highlight.
This simple fruit painting demonstrates how to suggest three‑dimensional shape through color temperature and lifting techniques.
4. Basic Mountain Silhouette
Mountains are essentially jagged triangles against a sky. They allow you to experiment with layered washes and the concept of atmospheric depth.
- Paint a sky wash as described in the first section.
- While the sky is still damp, tilt the paper to let the wash settle, creating a natural horizon line.
- Once dry, sketch a few irregular triangle shapes for mountain peaks.
- Use a wet‑on‑dry approach: apply a muted green‑gray wash to the base of the mountains.
- Add darker shadows on the leeward side with a dry brush for texture.
The result is a striking landscape that looks complex but is built from very simple geometric forms.
5. Simple Water Ripple
Water ripples let you explore repetitive patterns and subtle color variations without needing precise detail. They’re great for practicing the wet‑on‑wet diffusion.
- Wet a horizontal band across the paper.
- Drop in a light wash of cerulean blue and a touch of ultramarine.
- While the wash is still fluid, quickly flick a fine brush loaded with a darker blue across the surface to create ripple lines.
- Allow the colors to mingle, then lift a few thin strips with a damp cloth to suggest foam.
Ripples teach you how to control movement and how to create texture through simple brush strokes.
Technique Spotlight: Wet‑on‑wet vs Dry Brush
Understanding when to use each technique can dramatically improve your results. Below is a side‑by‑side comparison.
| Aspect | Wet‑on‑wet | Dry Brush |
|---|---|---|
| Paper state | Wet surface | Dry surface |
| Effect | Soft gradients, color bleed | Sharp edges, texture |
| Best for | Skies, water, background washes | Veins, tree bark, highlights |
| Control level | Low - relies on fluid dynamics | High - artist dictates line |
| Common mistakes | Uneven edges, over‑bleeding | Scratching paper, hard lines |
Step‑by‑Step Mini‑Project: Paint a Simple Sunset
Let’s put everything together in a quick 15‑minute sunset. You’ll use a sky wash, a dry brush silhouette, and a few lifted highlights.
- On a 11x14" cold‑pressed sheet, sketch a low horizon line.
- Wet the sky area (above the line) with a flat brush and clean water.
- Add a splash of warm orange near the horizon, let it flow upward.
- Drop a hint of pink and a touch of deep purple at the top for a gradient.
- While the sky is still damp, paint a simple black silhouette of a tree using a dry brush.
- Lift a tiny white spot on the horizon with a damp paper towel for the sun’s glare.
- Let dry, then sign the corner.
This exercise reinforces wet‑on‑wet for atmospheric color, dry brush for crisp forms, and lifting for highlights - all core skills for an easy watercolor subject.
Common Pitfalls and How to Fix Them
- Paper buckling: Use a board and tape the edges down; choose 140lb paper to reduce warping.
- Over‑saturation: If the paper looks soggy, blot with a clean cloth and wait for it to dry before adding more layers.
- Bleeding colors: Define a dry edge with a clean dry brush before applying a new wash.
- Hard lines: Load the brush lightly and use a smooth wrist motion; practice on scrap paper first.
Next Steps for Progress
Now that you’ve built confidence with these simple subjects, challenge yourself in three ways:
- Combine two subjects - like a sky with a leaf silhouette in the foreground.
- Introduce a limited palette (e.g., only three colors) to learn mixing depth.
- Try a quick plein‑air session outdoors; the changing light will sharpen your observational skills.
Remember, watercolor thrives on spontaneity. The easier the subject, the faster you’ll see what works and what doesn’t. Keep experimenting, and soon you’ll move from simple shapes to fully realized scenes.
Frequently Asked Questions
What paper weight is best for beginners?
Cold‑pressed paper at 140lb (300gsm) offers a good balance of absorbency and durability. It handles both wet‑on‑wet and dry brush without tearing.
Do I need to buy expensive brushes?
No. Synthetic round and flat brushes in sizes 6‑8 and 1‑2 work well. As you progress, you can upgrade to natural‑hair brushes for finer control.
How many colors should I start with?
A basic set of 12 pan colors (including a warm red, cadmium yellow, ultramarine blue, and a few earth tones) lets you mix most hues needed for simple subjects.
Can I use this technique for watercolor pencils?
Yes. Apply a light wash first, then go over the dried pencil lines with a damp brush to blend colors. The same wet‑on‑wet and dry brush principles apply.
What’s the fastest way to fix a muddy wash?
If the wash is still wet, blot with a clean paper towel and add a fresh, clean water wash on top. Once dry, lift the color with a damp sponge to reveal the paper’s whiteness.