Ever stared at your stack of sketches and thought, “Man, these would look awesome on a shirt or an Instagram feed?” You’re not the only one. Turning paper drawings into jaw-dropping digital art is way less intimidating than people think, and honestly, it’s pretty fun once you get rolling. Take it from someone who’s smudged up plenty of eraser dust — going digital isn’t just for tech wizards or those anime prodigies on YouTube. Anyone can do it with a few right moves.
Preparing Your Drawing for the Digital World
There’s nothing worse than finally deciding to digitize your art, snapping a quick photo, and realizing half the lines are fuzzy or the shades are all off. Start with a solid drawing. Pencil lines too light? Go over them with a fine-tipped pen or dark mechanical pencil. The contrast matters because your scanner or camera will pick up bolder lines way better and you’ll thank yourself during clean-up later. Swap wrinkled paper for a fresh sheet — even subtle crinkles can mess with your digital linework.
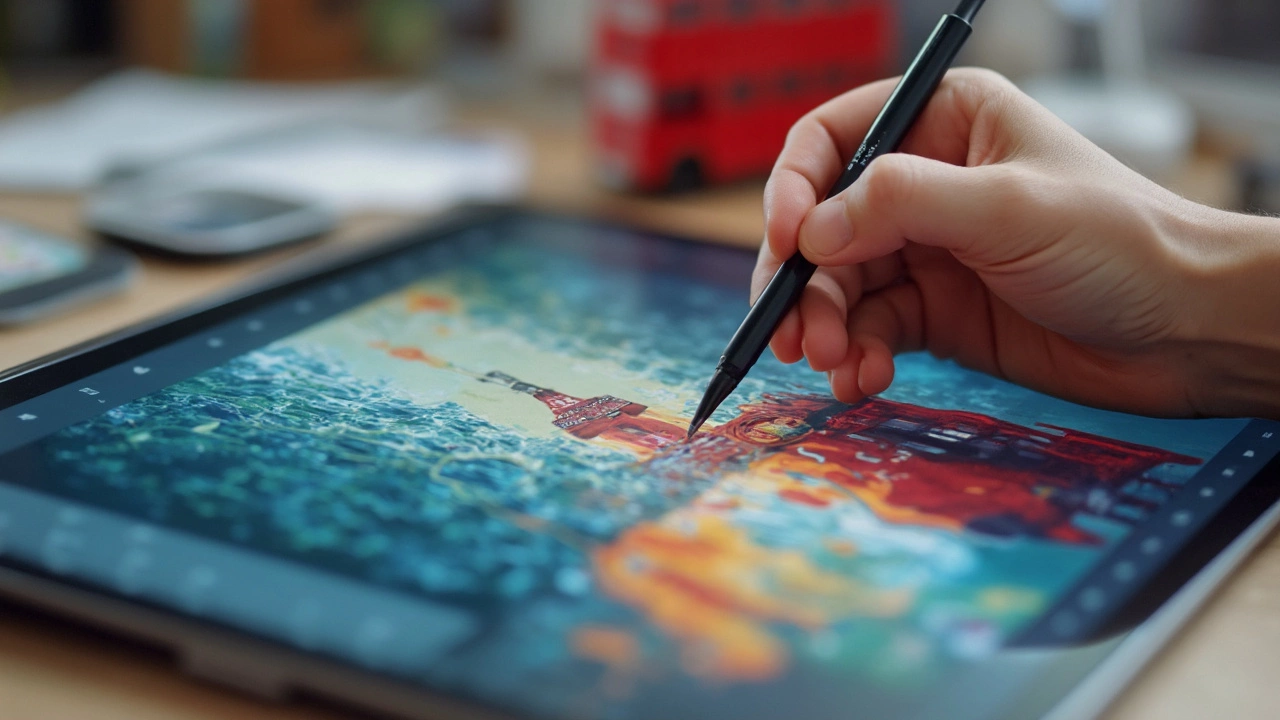
Choosing the right capture method is like picking your fighter. You’ve got two real options: scanning and photographing. If you own a scanner, most home models with at least 300 DPI resolution are more than enough for black-and-white sketches or outlines. If your art’s huge or you just… forgot where you put the scanner, a phone camera works but you have to work smarter. Find a spot with natural, even lighting — no harsh sun or overhead lamps creating shadows. Put the drawing on a flat surface, hold your phone right above (not angled), and snap at the highest setting. Use gridlines on your phone camera to make sure you’re not tilting things sideways. Don’t use flash unless you want to risk weird bright spots or washed-out paper texture.
After you’ve scanned or shot your drawing, pop it onto your computer. Blemishes and accidental fingerprints are easy to fix with basic editing (more on that soon). Filetype does matter here. If your scanner spits out JPGs, that’s okay, but for best quality — especially if you want to someday print big, sharp posters — switch to PNG or TIFF. They don’t compress your art as much. Give your file a simple, clear name with the date attached. "DragonSketch_June2025.png" is way better than "finally_thisone23a.jpg" when you’re looking for it later.
This is a good moment to check your resolution. For art you want to print, aim for 300 DPI (dots per inch) or higher. If it’s just for Instagram or web viewing, 72 DPI holds up fine at normal sizes, but bump it up for professional looks. And here’s a tip from the trenches: always keep your original scan untouched. Duplicate it before you start experimenting, because sometimes two hours of edits can go sideways fast, and you’ll want a clean backup.
Let’s see how the different methods stack up when capturing drawings:
| Method | Best For | Resolution | Quick Tip |
|---|---|---|---|
| Flatbed Scanner | Detailed line art | 300-600 DPI | Great for precise work |
| Phone Camera | Large or textured art | Varies, up to 12MP+ | Use daylight, avoid flash |
| Professional Scan Service | Portfolio-grade pieces | 600 DPI+ | Useful for exhibitions |
Cleaning Up and Enhancing Your Sketch Digitally
Now the magic really starts: digital editing. Don’t worry, you don’t need Photoshop unless you want to get super fancy. Free programs like GIMP (Windows/Mac/Linux) or Krita (especially popular among digital artists) can pull serious weight. Even Procreate on an iPad or Autodesk SketchBook on your phone can handle most edits. Just make sure your device can open the file and has enough memory — big art files eat up space like nothing.
First step: cleaning up. Zoom in and look for dust specks, smudges, or weird shadows from your scan/photo. Use a white “brush” or eraser tool to spot-fix them. If your lines are faded, adjust the Levels or Curves (you’ll find these in almost every editor under Adjustments). Slide the black and white input sliders closer together so the white is brighter and blacks are sharp. Bam, instant clarity.
If the background’s still off-white or gray, select it with a Magic Wand or Lasso tool and fill it with pure white. Double-check that you’re not erasing edges of your precious lines. If your software allows layers, separate the linework onto its own layer (some programs have an “Extract Line Art” or “Multiply” layer option for this). Working on layers is a lifesaver — it keeps your background and color changes from messing with your original lines.
Here’s a pro tip: don’t go overboard trying to “fix” every tiny imperfection. Sometimes those little wiggles and weird dots are what make your art feel human and cool, not stiff like a vector logo. If you drew shading by hand, you can leave it or add new digital shading later — depends on the vibe you want.
Want to boost your lines beyond just black and white? You can experiment with line color too. Use the Color Replace tool or lock transparent pixels and add a dark red, blue, or brown hue to your lines for warmth. Digitally darkened outlines can look more intentional and stylized, especially for webcomics or prints. If your drawing included colored pencil or watercolor, you’ll probably want to increase the saturation and boost contrast so the colors don’t get muddy in digital form.
Before you move to coloring, always save your cleaned-up art as a new file. Keep a habit of saving regularly — file corruption or accidental crashes happen to everyone eventually. If you’re using a more RAM-hungry program, enable autosave features.
Let’s not skip a quirky, old-school trick: if you love the grain of your paper (especially on textured watercolor or toned paper), you can keep some of it by duplicating your original scan and lowering its opacity over your cleaned-up art. It adds a bit of softness and “real” feeling that pure digital sometimes lacks.
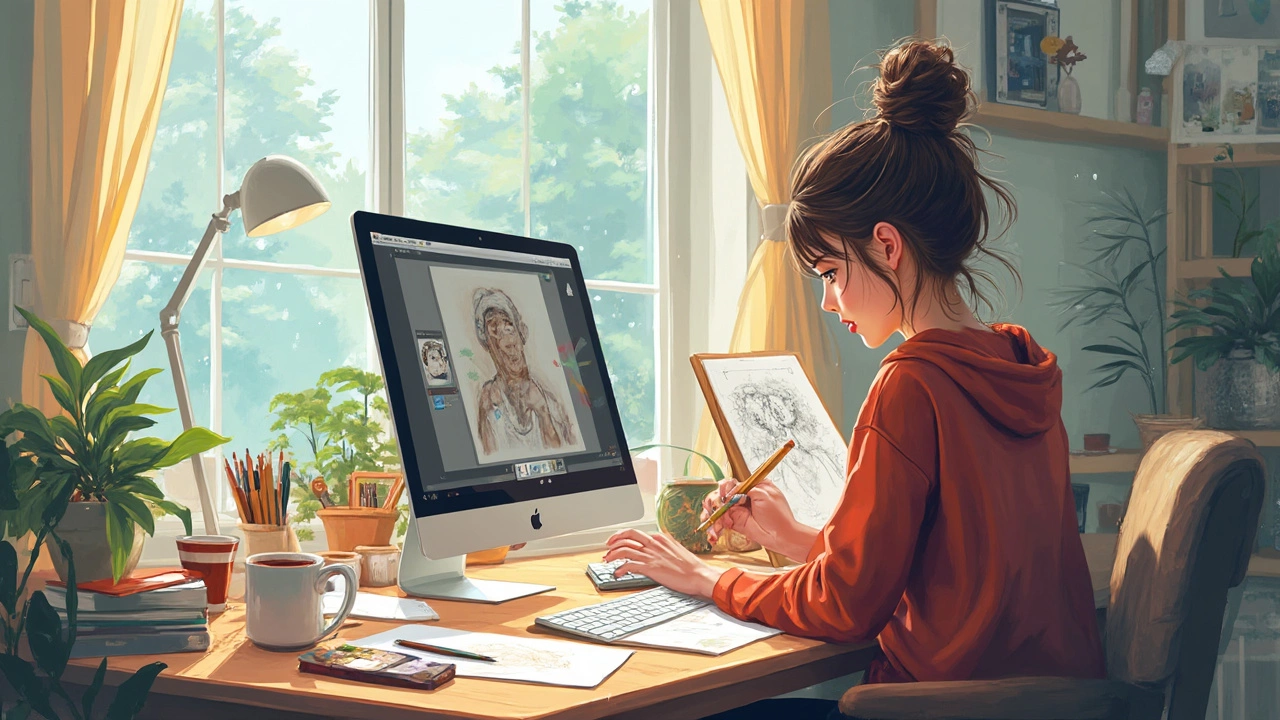
Coloring and Transforming Your Digital Drawing
This is the stage where your sketch really turns into digital art. There’s more than one way to get the job done, but most folks use a drawing tablet, like a Wacom or Huion, or an iPad with Apple Pencil. Drawing tablets let you draw right onto digital files with pen pressure, so shading and color blending feel natural. But you can totally use a mouse or even a touchpad if that’s all you’ve got — it’ll just take a little more time and patience.
Strong advice: start with basic flat colors. Make a new layer under your “line art” layer and block in each part (skin, hair, jacket, alien laser beams — whatever you drew). Don’t sweat being perfectly inside the lines — you can clean up the edges after. If you want to speed this up, look for Paint Bucket or Fill tools. Some programs offer Quick Mask or Magic Wand tools that let you select an area fast before you fill it in. This saves tons of time, especially if you’re working on a detailed piece.
Once you’ve blocked in the flats, add a new layer for shadows and another for highlights. Set these layers to “Multiply” (for shadows) or “Screen”/“Add” (for highlights). Pick colors a shade or two darker or lighter than your base color — this helps things pop and look less flat. Want that “painted” look? Try out digital brushes that mimic watercolor, oil, or pencils. You can download new brush packs for free or cheap online — folks share their favorites on art forums all the time.
Don’t feel like you have to shade and blend everything perfectly. Sometimes simple, bold color-blocking looks way cooler and more graphic. Flip and zoom your canvas regularly, because little mistakes only show up after a while staring at your own work. It’s like broccoli in your teeth — you need a fresh angle to spot it.
If you want, add textures. Some artists scan scraps of paper, fabric, or even their own fingerprints, overlaying them with reduced opacity to give the art more dimension and interest. A little grain, a single smudge — they all bring life to your digital masterpiece. Want an easy texture? Grab a free high-res paper texture online and lay it underneath your art’s colors.
Just about all programs support exporting your work in famous web formats like JPEG, PNG, GIF, and sometimes PSD or TIFF if you want to keep layered files for printing or later edits. Choosing PNG preserves your pretty colors best, especially with transparent backgrounds. For animations or moving parts, save in GIF or export frame-by-frame as needed. If you’re posting on Instagram, crop the image to square or its preferred ratios; some platforms compress your file, so keeping the original, high-quality version matters.
If you’re prepping for print, double-check size and color settings. Many print shops use CMYK color mode, while screens display in RGB. You can convert this in most editors (look up your software’s guide on “color profiles”). If you forget, your printed reds and blues might not match the screen perfectly. Artists usually size at 300 DPI for prints, and it never hurts to do a tiny test print at home before ordering a full run of posters or shirts.
Want to really level up? Try combining hand-drawn work with digital painting. Artists often start with a sketch, clean it up digitally, then use airbrush, soft eraser, and smudge tools to build up tones and textures. Sometimes they even print out the digital edit, add more pencil or ink, and scan it back in for another round — the cycle of creativity has no rules.
So, whether you want to create stickers, comics, custom tees, or just blow friends’ minds with a “before and after” post, digitizing your art is way more accessible than ever. The trick is not getting stuck chasing pixel-perfect results, but having a solid workflow: prep right, clean it up, experiment with color, and keep backups of every major step. Your unique hand-drawn style is what sets you apart, even in the digital age. And hey, you might soon find your art on someone’s phone lock screen or as their favorite meme template.